Questioning Community

The following blog post developed out of a larger research project that explored best practices for building a sense of community within online/blended classrooms. That study was supported by a Faculty Fellowship from CI’s Teaching & Learning Innovations Team, and was conducted by Kellie Prather (undergraduate student at CI), Brandon Burns (undergraduate student at CI), […]

Breaking the Ice in Online/Blended Classes

The following blog post developed out of a larger research project that explored best practices for building a sense of community within online/blended classrooms. That study was supported by a Faculty Fellowship from CI’s Teaching & Learning Innovations Group, and was conducted by Kellie Prather (undergraduate student at CI), Brandon Burns (undergraduate student at CI), […]

Getting Started

  1. Add a new post
    • Go to http://345group6.tollefson.cikeys.com/wp-admin and log in. To log in:
      • Your first name is your user name.
      • Your password is masterman (all lower case). Len Masterman is one of the original media literacy proponents in the United States. You’ll be reading some of his seminal work in this course.
    • Click + New
    • Give it a title
    • Add your text in the dialogue box. You can change text style (bold, italics, text color, etc) by selecting menu tools above. If you do not see two rows of tools, select the icon that looks like a box, called “Toolbox Toggle” and more tools will appear.
  2. You can also insert images in the dialogue box by:
    • selecting the Media button and uploading pics;
    • in your dialogue box select the Add Media button (located above the toolbar)
  3. You can send people to other websites by linking to them from within your dialogue box.
    • Type the descriptor for that website. For example: Kaia’s website
    • Highlight that descriptor
    • Select the Insert/Edit Link tool. In that dialogue box, paste the website address and select “open link in a new window/tab” and then click “Add Link”
    • The web description is now clickable, and linked to that web address: Kaia’s website
  4. Click Publish.
  5. Voilá! You have posted.
  6. Read each other’s posts and respond to them via comments (click the speech bubble next to the post title), not via new posts.
  7. Visit other groups’ blogs throughout the semester. Look for opportunities to encourage and appreciate each other’s critical engagement with course readings and other learning activities.

Getting Started

  1. Add a new post
    • Go to http://345group5.tollefson.cikeys.com/wp-admin and log in. To log in:
      • Your first name is your user name.
      • Your password is masterman (all lower case). Len Masterman is one of the original media literacy proponents in the United States. You’ll be reading some of his seminal work in this course.
    • Click + New
    • Give it a title
    • Add your text in the dialogue box. You can change text style (bold, italics, text color, etc) by selecting menu tools above. If you do not see two rows of tools, select the icon that looks like a box, called “Toolbox Toggle” and more tools will appear.
  2. You can also insert images in the dialogue box by:
    • selecting the Media button and uploading pics;
    • in your dialogue box select the Add Media button (located above the toolbar)
  3. You can send people to other websites by linking to them from within your dialogue box.
    • Type the descriptor for that website. For example: Kaia’s website
    • Highlight that descriptor
    • Select the Insert/Edit Link tool. In that dialogue box, paste the website address and select “open link in a new window/tab” and then click “Add Link”
    • The web description is now clickable, and linked to that web address: Kaia’s website
  4. Click Publish.
  5. Voilá! You have posted.
  6. Read each other’s posts and respond to them via comments (click the speech bubble next to the post title), not via new posts.
  7. Visit other groups’ blogs throughout the semester. Look for opportunities to encourage and appreciate each other’s critical engagement with course readings and other learning activities.

Getting Started

  1. Add a new post
    • Go to http://345group4.tollefson.cikeys.com/wp-admin and log in. To log in:
      • Your first name is your user name.
      • Your password is masterman (all lower case). Len Masterman is one of the original media literacy proponents in the United States. You’ll be reading some of his seminal work in this course.
    • Click + New
    • Give it a title
    • Add your text in the dialogue box. You can change text style (bold, italics, text color, etc) by selecting menu tools above. If you do not see two rows of tools, select the icon that looks like a box, called “Toolbox Toggle” and more tools will appear.
  2. You can also insert images in the dialogue box by:
    • selecting the Media button and uploading pics;
    • in your dialogue box select the Add Media button (located above the toolbar)
  3. You can send people to other websites by linking to them from within your dialogue box.
    • Type the descriptor for that website. For example: Kaia’s website
    • Highlight that descriptor
    • Select the Insert/Edit Link tool. In that dialogue box, paste the website address and select “open link in a new window/tab” and then click “Add Link”
    • The web description is now clickable, and linked to that web address: Kaia’s website
  4. Click Publish.
  5. Voilá! You have posted.
  6. Read each other’s posts and respond to them via comments (click the speech bubble next to the post title), not via new posts.
  7. Visit other groups’ blogs throughout the semester. Look for opportunities to encourage and appreciate each other’s critical engagement with course readings and other learning activities.

Getting Started

  1. Add a new post
    • Go to http://345group1.tollefson.cikeys.com/wp-admin and log in. To log in:
      • Your first name is your user name.
      • Your password is masterman (all lower case). Len Masterman is one of the original media literacy proponents in the United States. You’ll be reading some of his seminal work in this course.
    • Click + New
    • Give it a title
    • Add your text in the dialogue box. You can change text style (bold, italics, text color, etc) by selecting menu tools above. If you do not see two rows of tools, select the icon that looks like a box, called “Toolbox Toggle” and more tools will appear.
  2. You can also insert images in the dialogue box by:
    • selecting the Media button and uploading pics;
    • in your dialogue box select the Add Media button (located above the toolbar)
  3. You can send people to other websites by linking to them from within your dialogue box.
    • Type the descriptor for that website. For example: Kaia’s website
    • Highlight that descriptor
    • Select the Insert/Edit Link tool. In that dialogue box, paste the website address and select “open link in a new window/tab” and then click “Add Link”
    • The web description is now clickable, and linked to that web address: Kaia’s website
  4. Click Publish.
  5. Voilá! You have posted.
  6. Read each other’s posts and respond to them via comments (click the speech bubble next to the post title), not via new posts.
  7. Visit other groups’ blogs throughout the semester. Look for opportunities to encourage and appreciate each other’s critical engagement with course readings and other learning activities.

Getting Started

  1. Add a new post
    • Go to http://345group3.tollefson.cikeys.com/wp-admin and log in. To log in:
      • Your first name is your user name.
      • Your password is masterman (all lower case). Len Masterman is one of the original media literacy proponents in the United States. You’ll be reading some of his seminal work in this course.
    • Click + New
    • Give it a title
    • Add your text in the dialogue box. You can change text style (bold, italics, text color, etc) by selecting menu tools above. If you do not see two rows of tools, select the icon that looks like a box, called “Toolbox Toggle” and more tools will appear.
  2. You can also insert images in the dialogue box by:
    • selecting the Media button and uploading pics;
    • in your dialogue box select the Add Media button (located above the toolbar)
  3. You can send people to other websites by linking to them from within your dialogue box.
    • Type the descriptor for that website. For example: Kaia’s website
    • Highlight that descriptor
    • Select the Insert/Edit Link tool. In that dialogue box, paste the website address and select “open link in a new window/tab” and then click “Add Link”
    • The web description is now clickable, and linked to that web address: Kaia’s website
  4. Click Publish.
  5. Voilá! You have posted.
  6. Read each other’s posts and respond to them via comments (click the speech bubble next to the post title), not via new posts.
  7. Visit other groups’ blogs throughout the semester. Look for opportunities to encourage and appreciate each other’s critical engagement with course readings and other learning activities.

Getting Started

  1. Add a new post
    • Go to http://345group2.tollefson.cikeys.com/wp-admin and log in. To log in:
      • Your first name is your user name.
      • Your password is masterman (all lower case). Len Masterman is one of the original media literacy proponents in the United States. You’ll be reading some of his seminal work in this course.
    • Click + New
    • Give it a title
    • Add your text in the dialogue box. You can change text style (bold, italics, text color, etc) by selecting menu tools above. If you do not see two rows of tools, select the icon that looks like a box, called “Toolbox Toggle” and more tools will appear.
  2. You can also insert images in the dialogue box by:
    • selecting the Media button and uploading pics;
    • in your dialogue box select the Add Media button (located above the toolbar)
  3. You can send people to other websites by linking to them from within your dialogue box.
    • Type the descriptor for that website. For example: Kaia’s website
    • Highlight that descriptor
    • Select the Insert/Edit Link tool. In that dialogue box, paste the website address and select “open link in a new window/tab” and then click “Add Link”
    • The web description is now clickable, and linked to that web address: Kaia’s website
  4. Click Publish.
  5. Voilá! You have posted.
  6. Read each other’s posts and respond to them via comments (click the speech bubble next to the post title), not via new posts.
  7. Visit other groups’ blogs throughout the semester. Look for opportunities to encourage and appreciate each other’s critical engagement with course readings and other learning activities.

You can book me (and we don’t have to email back and forth 4 times)

Lately I’ve been reflecting a lot about how I devote my time and energy and realized there are many logistical tasks I manage on a regular basis that could be automated with technology (and I love technology!).  One of these tasks is setting up meetings with students; we often email back and forth to find out when they are available, how long they want to meet, how soon they need to chat, what they want to discuss, etc.

To meet this need, I looked into various web-based scheduling tools and landed upon http://youcanbookme.com.   This service is free (though there are additional options/upgrades for paid subscriptions) and has allowed me to:
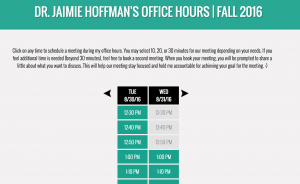
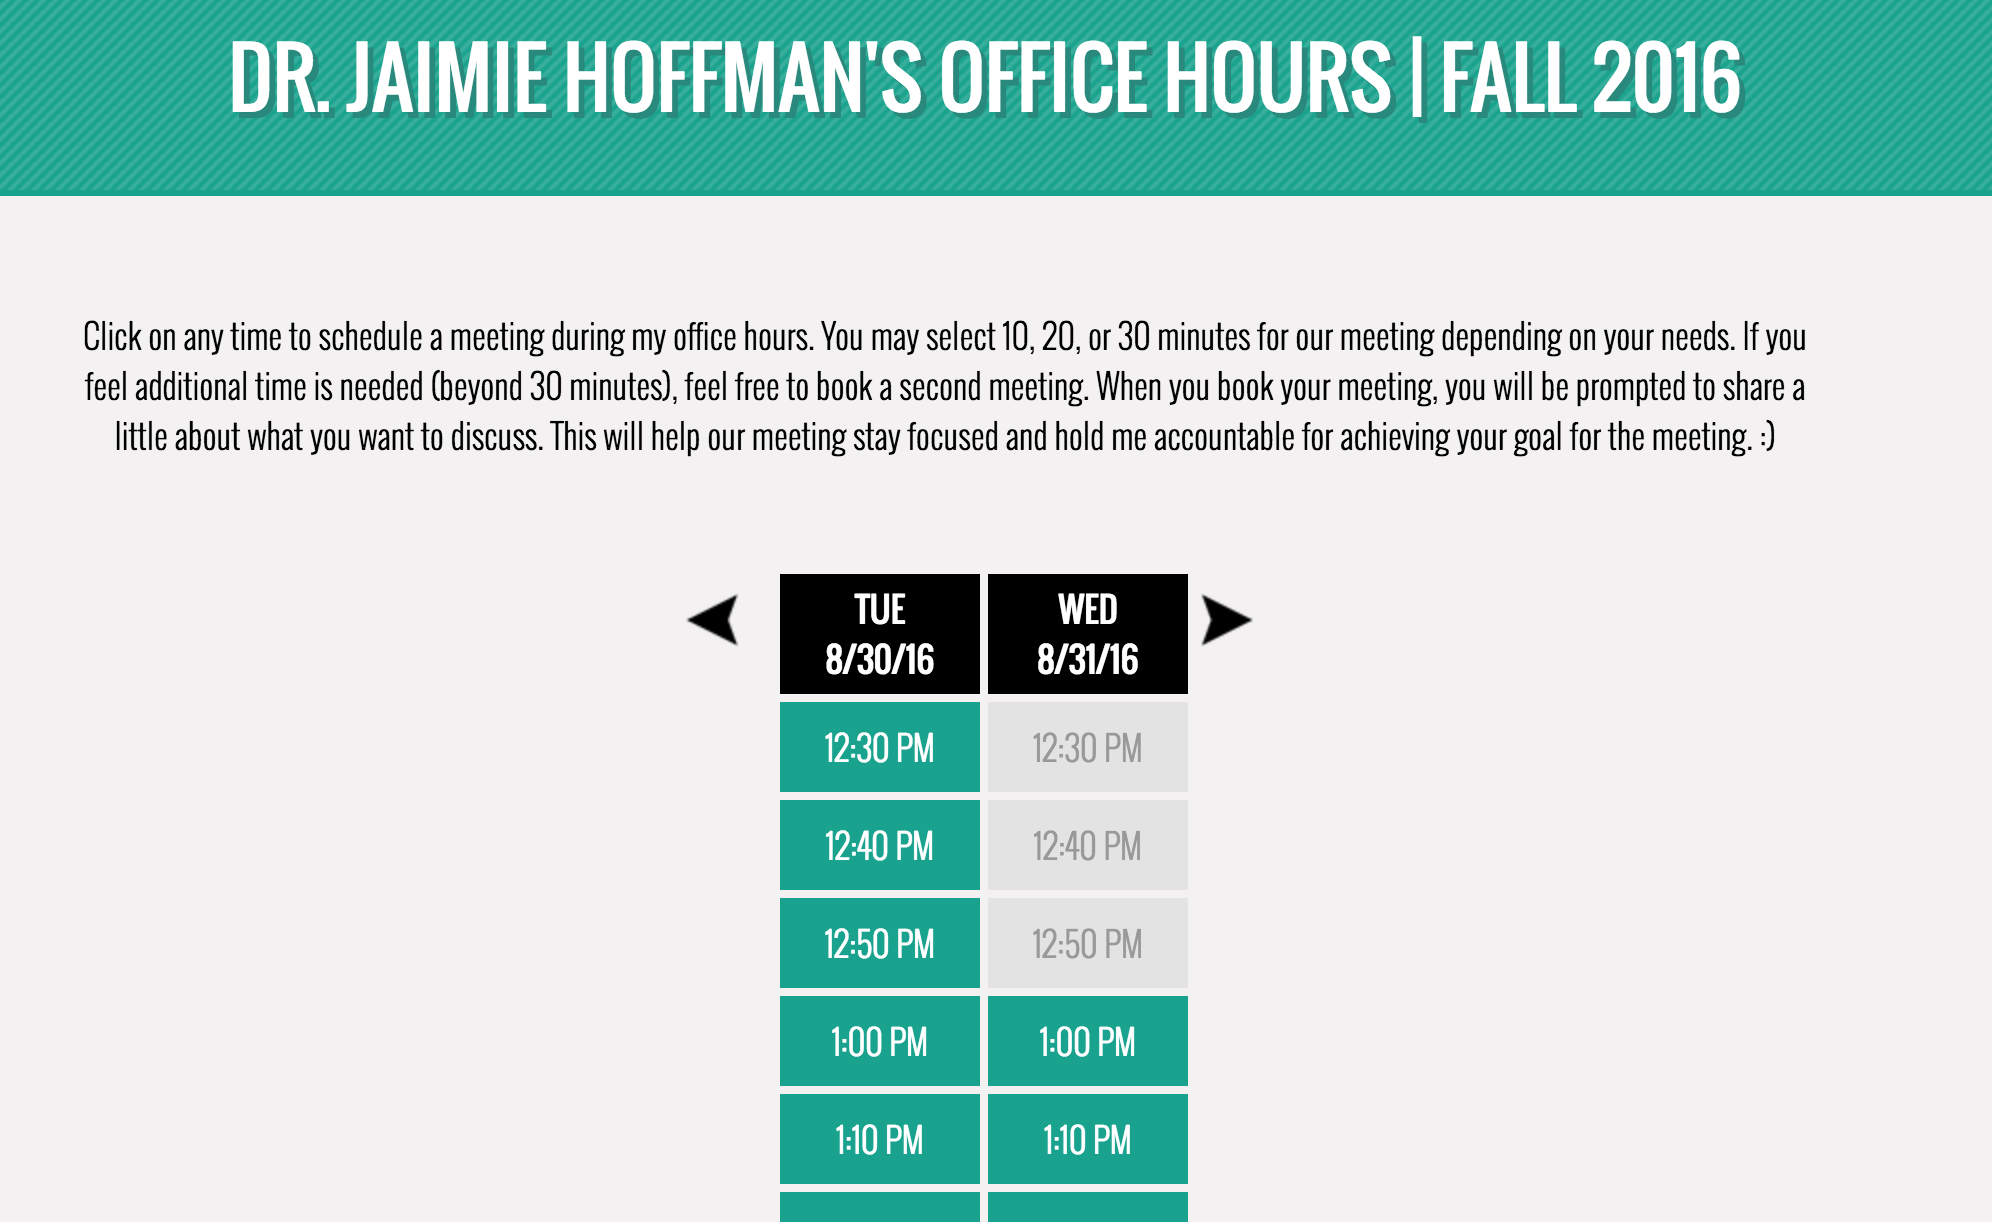
My schedule

  • provide my available weekly time blocks on a web-based calendar for students to click on and sign up for
  • ask students to decide how long they need for the appointment (I set up the default at 30 minute meetings but allow for 10 minute increments in case students have a quick question)
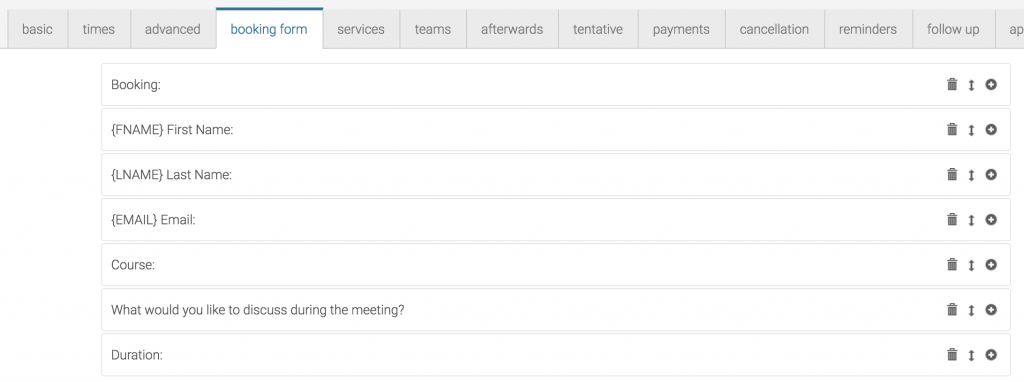
  • get an understanding of what students want to discuss (I added the field “what would you like to discuss during the meeting” to the sign up form, which is fully customizable)
  • have student appointments show up directly on my Apple calendar
  • not have to cancel meetings if student change their minds (they can do this themselves)

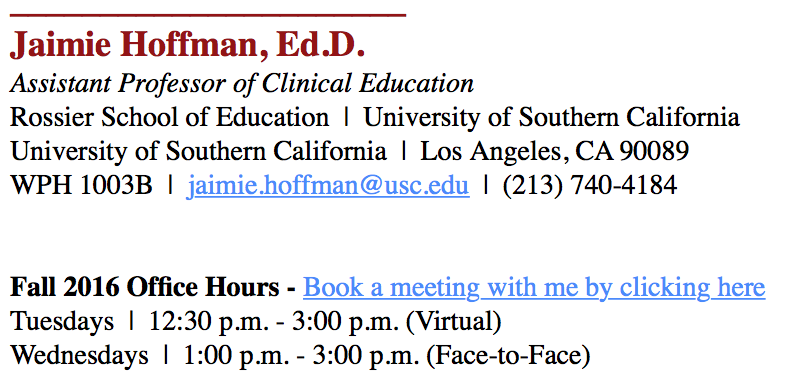
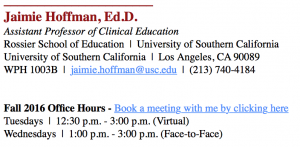
To communicate my availability to students, I post the link to my schedule https://jaimieusc.youcanbook.me/ in my email signature (see below) and on my syllabus.  Not only does it reduce time and energy with finding a common meeting time but it allows me to mentally (or physically) prepare to help them because I know what they want to discuss.  The calendar also allows students pick how soon they need to meet (perhaps their question is not urgent so they can wait a week if it’s busy for me), whereas I would normally try to get them in immediately.  And last, I do not like telling students “I’m full this week” so my calendar speaks for itself.
Screen Shot 2016-08-26 at 9.25.57 AM

I will admit that I am still unsure about not having the simple “open office hours” listing/availability because I like that students feel that they can drop by to visit.  But, that set up has occasionally caused stress because multiple people dropped in at the same time.

If you go with this method, I recommend making sure students know to contact you if your availability doesn’t like up so you are still perceived as being available.

Signing up is easy — go to http://youcanbookme.com, create an account and set up your preferences.  Here are some screen shots that illustrate how I set it up (this tool has a lot more functionality than what I have explored or need but feel free to play around).

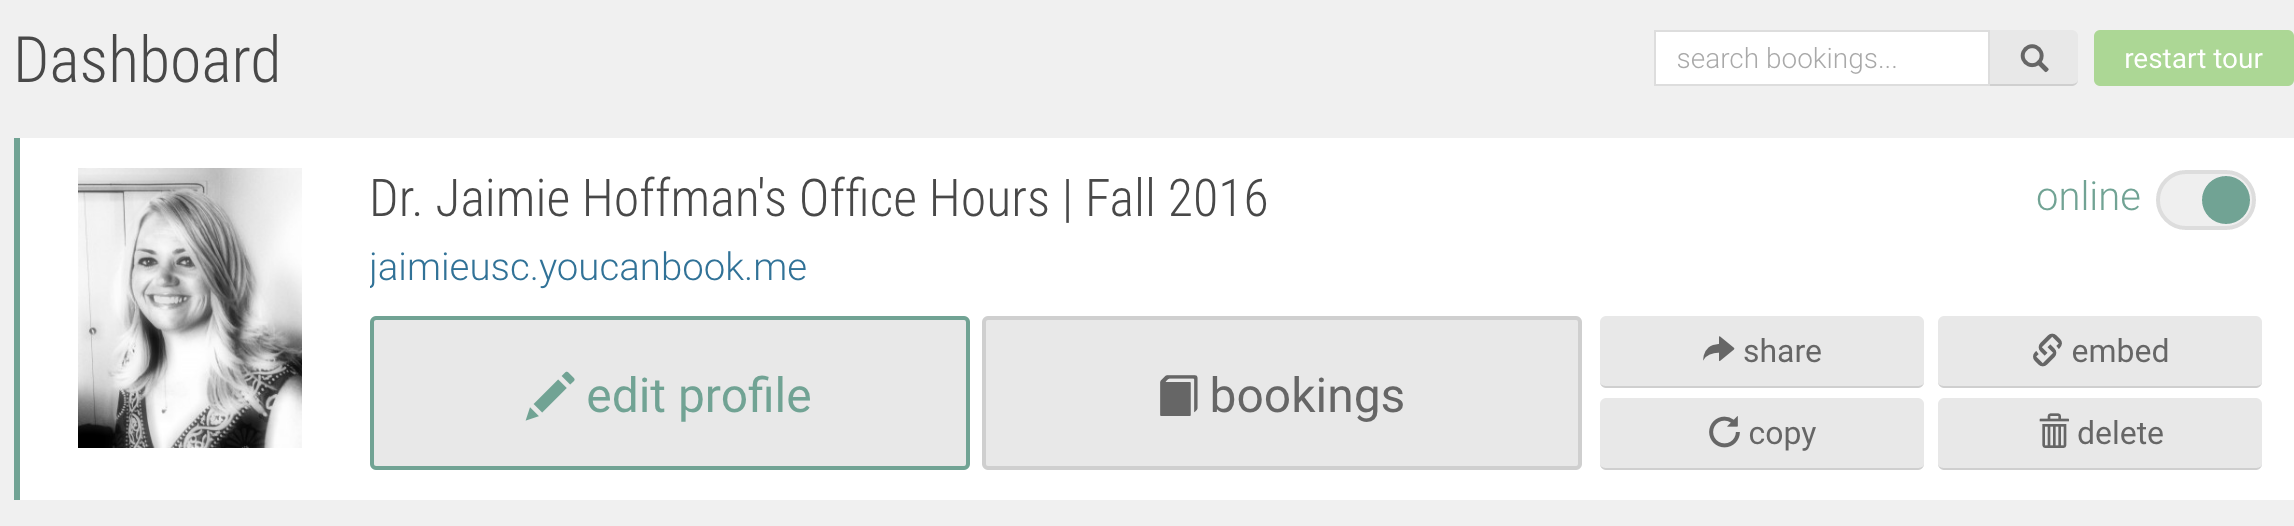
1. Log in and click “edit profile”
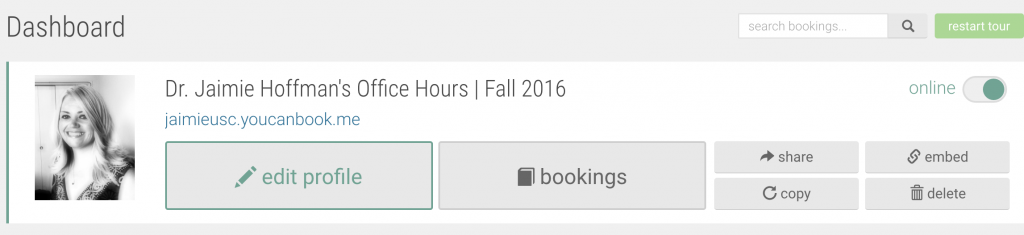
Screen Shot 2016-08-26 at 9.17.51 AM

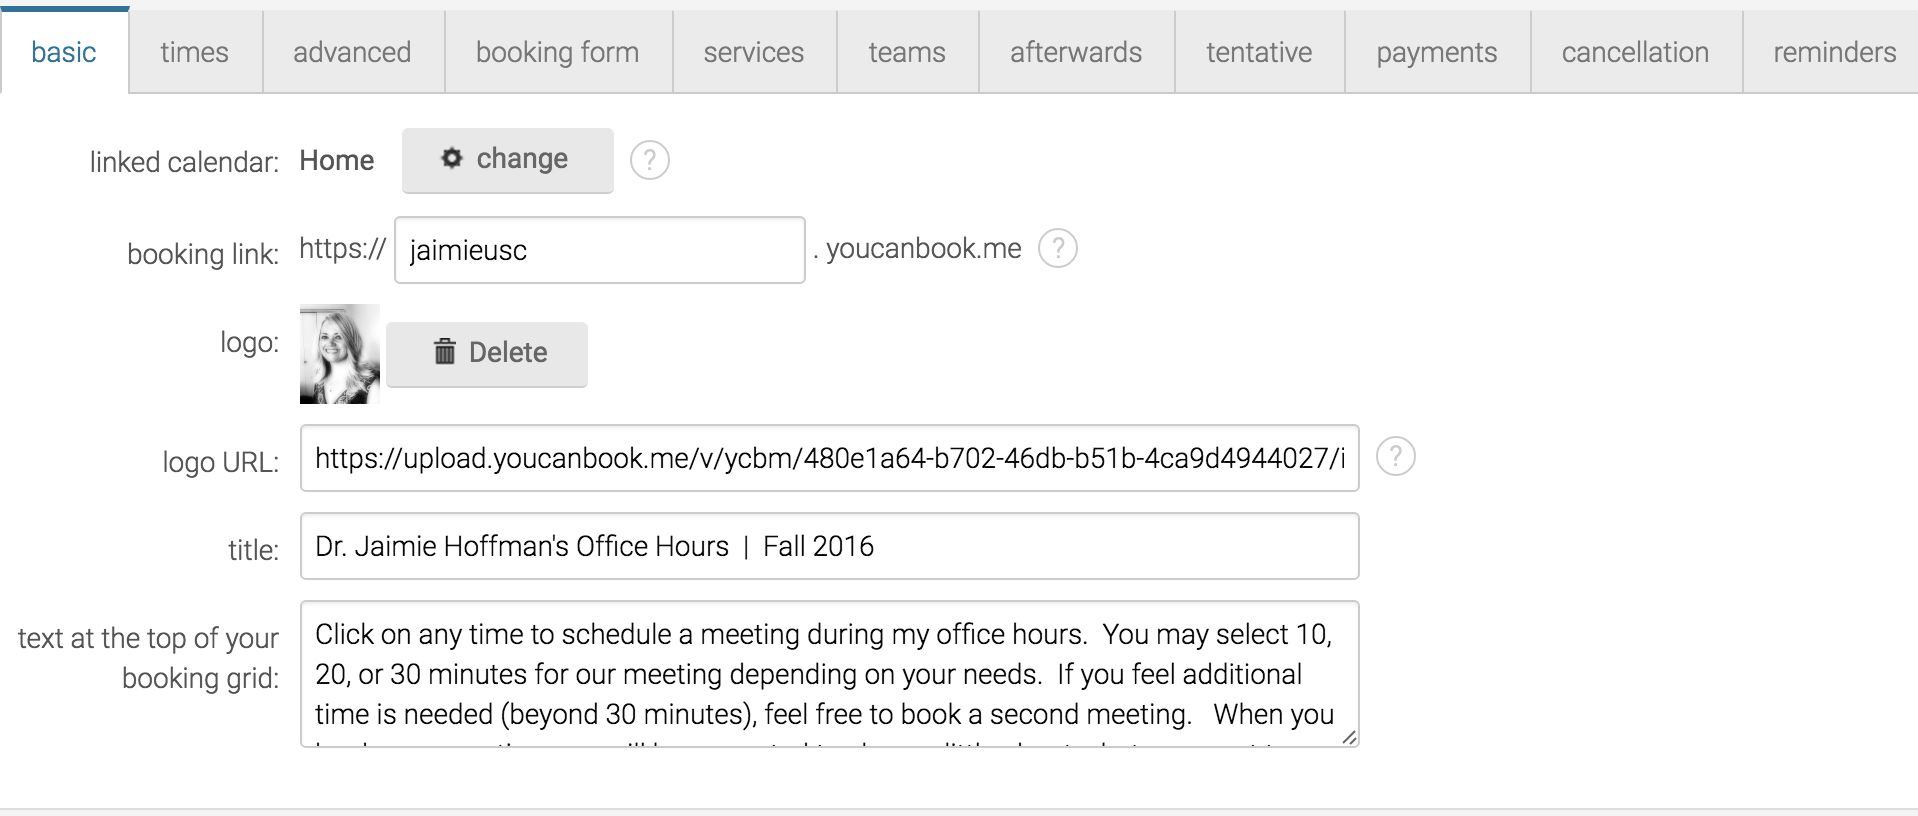
2. Edit the information on the “basic” page; you decide your booking link address and provide the info that students see when they land on your page.
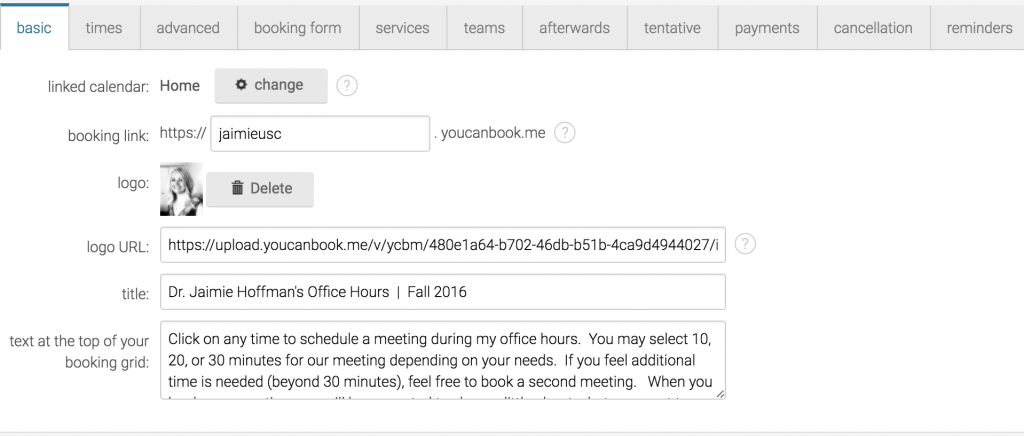
Screen Shot 2016-08-26 at 9.18.05 AM

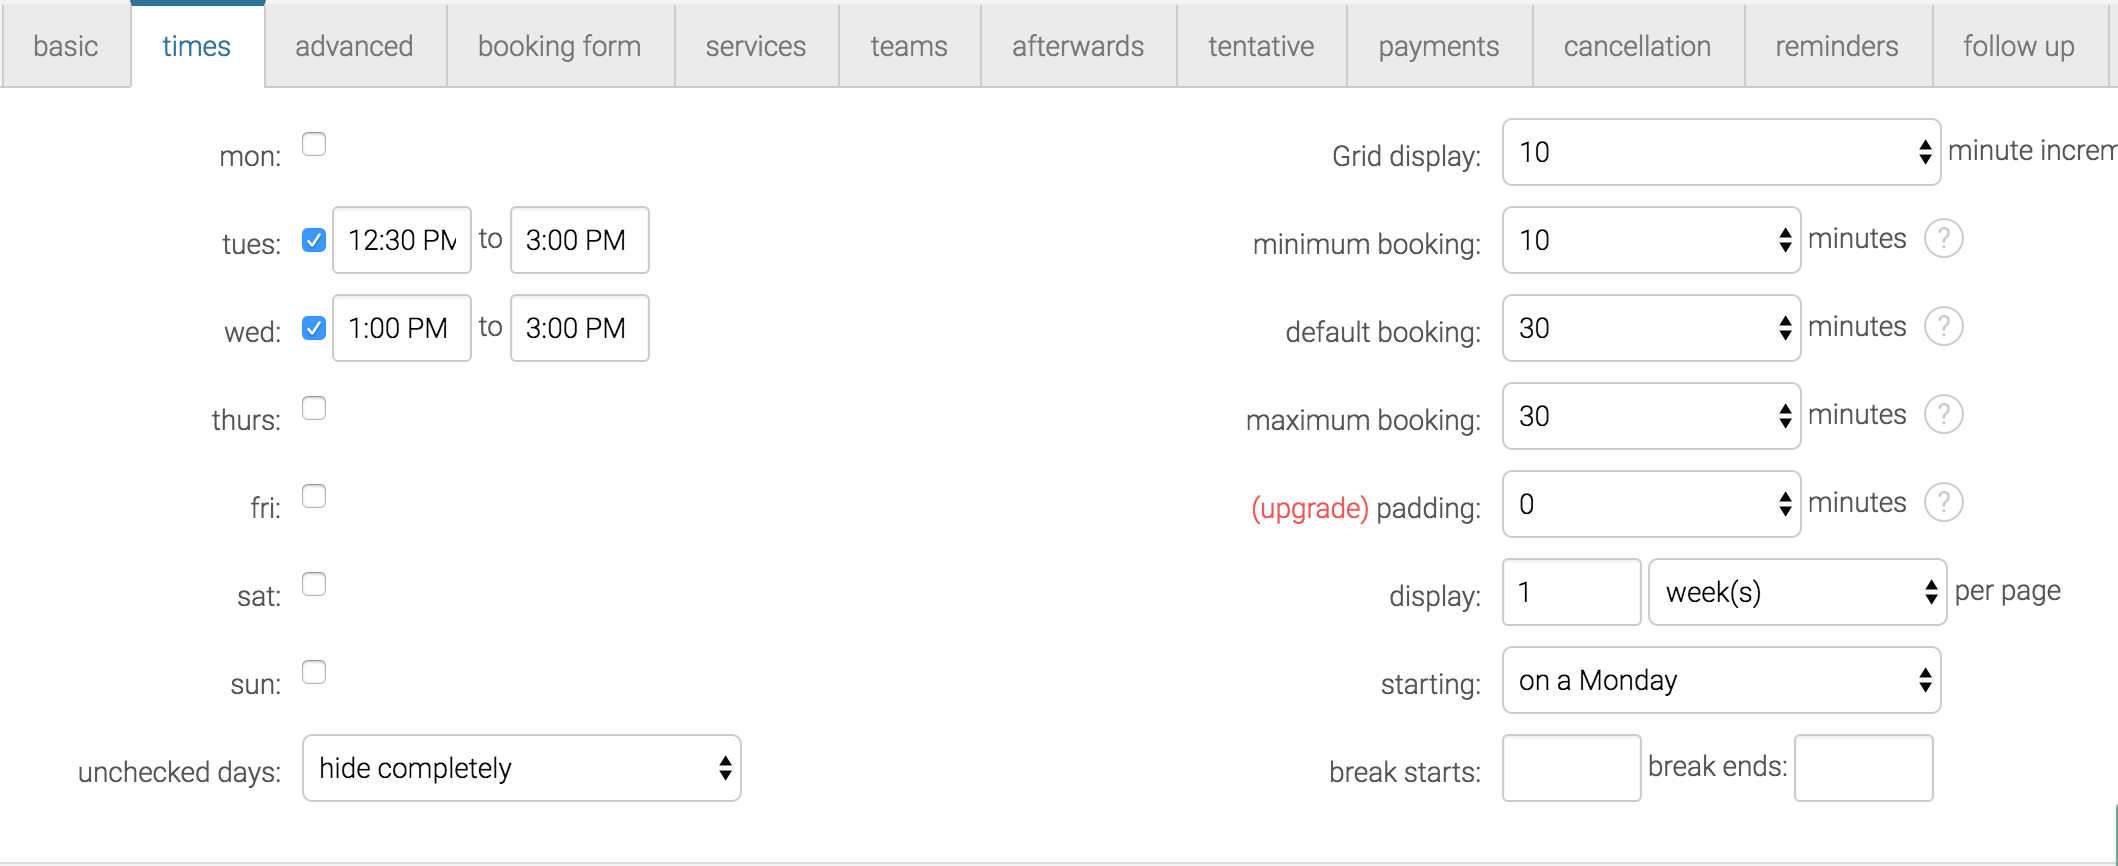
3. Edit the information on the “times” tab to identify your availability.  Unfortunately this does system does not work if your times are not recurring weekly. Screen Shot 2016-08-26 at 9.18.19 AM
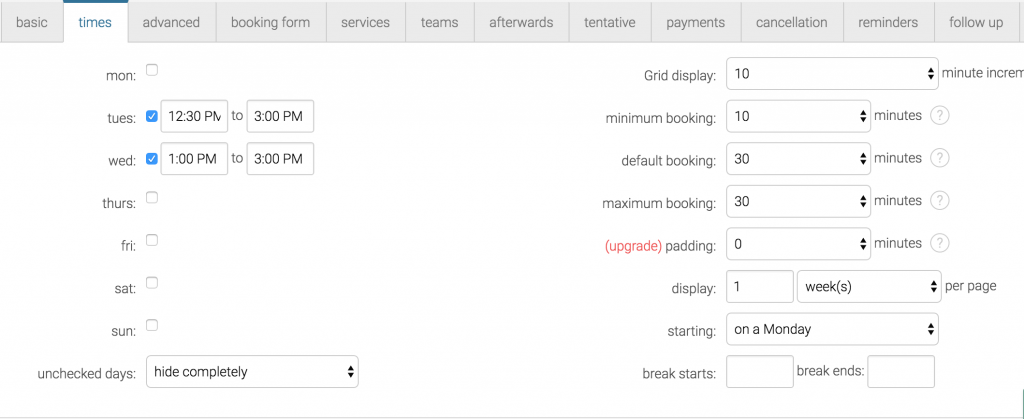
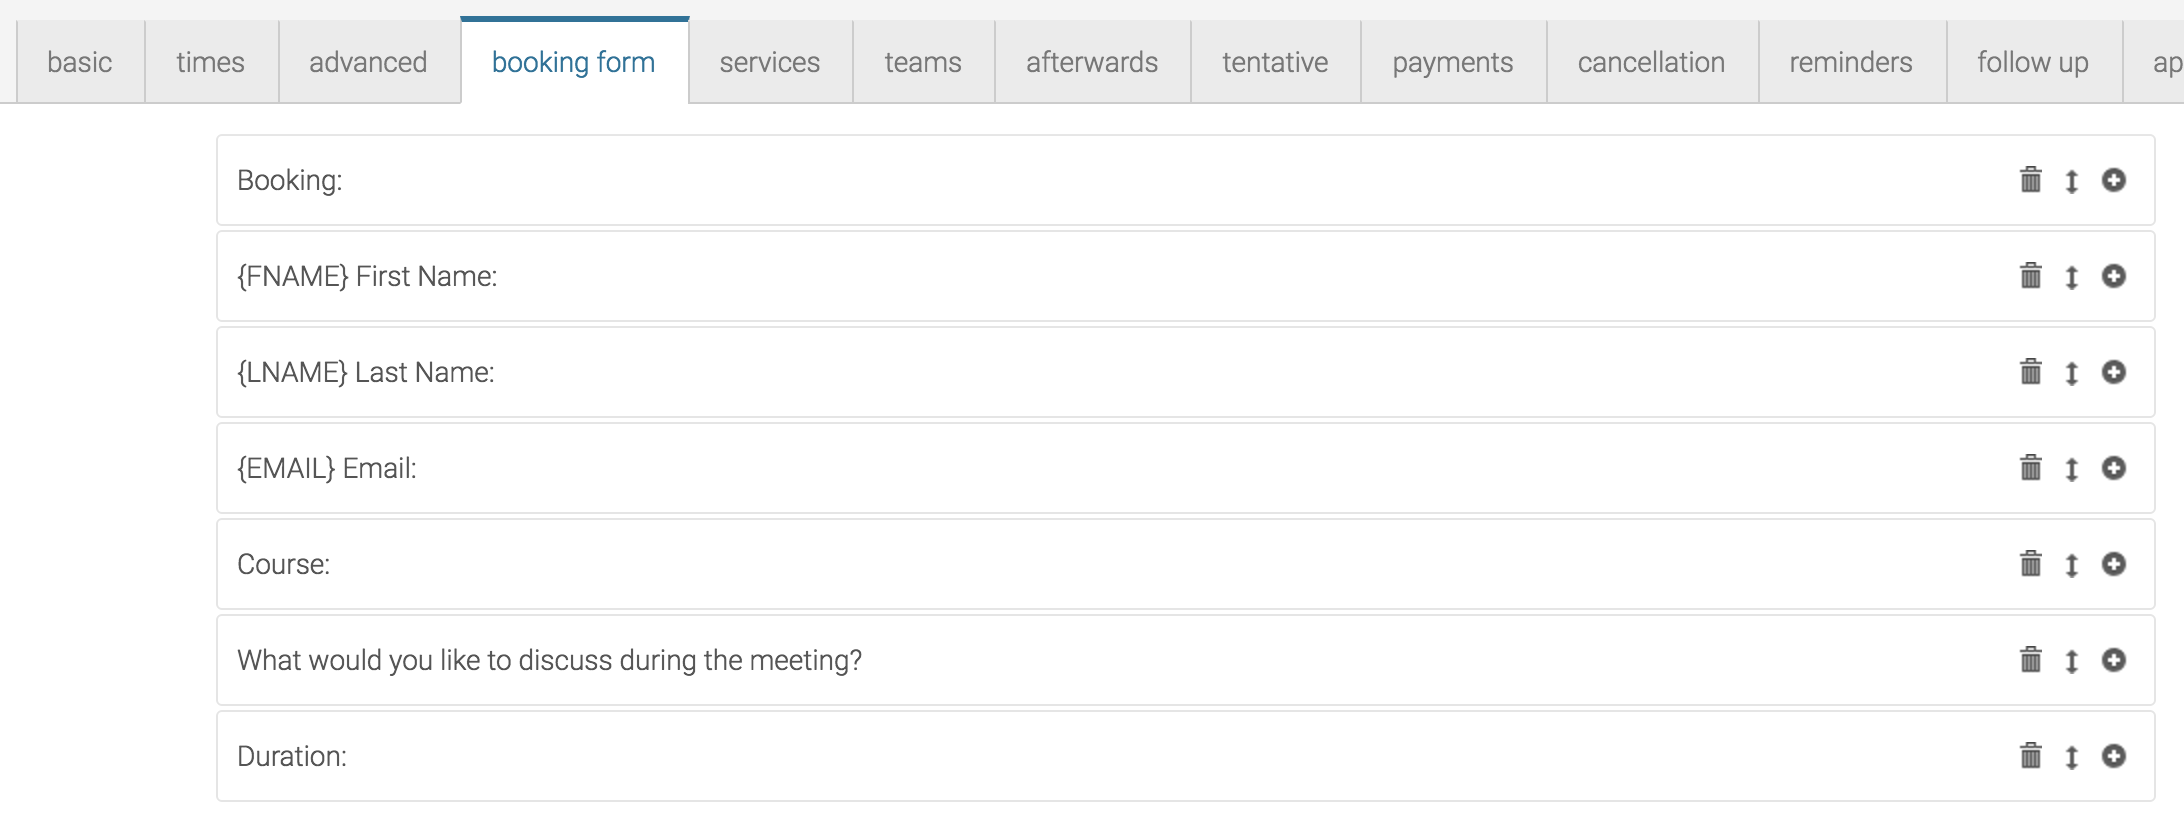
4. Edit the “booking form” tab to ensure the fields you want are present on the form your students fill out when they sign up.Screen Shot 2016-08-26 at 9.18.42 AM
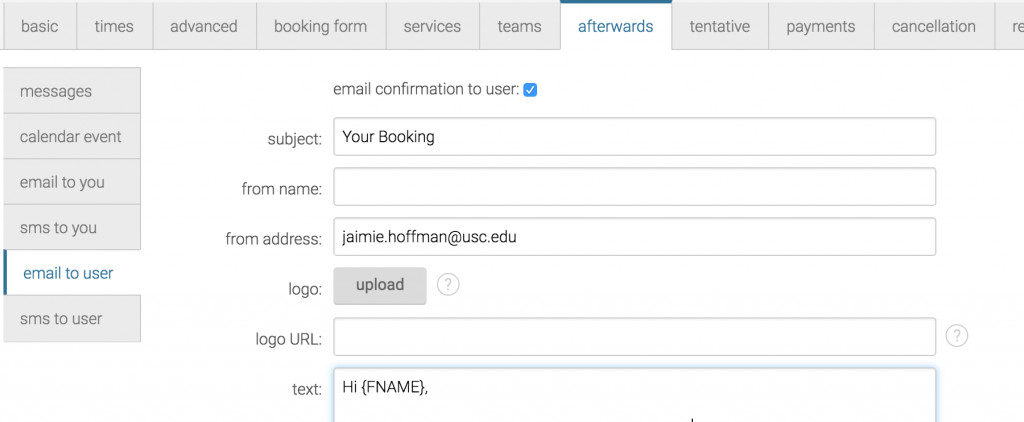
5. Edit the information on the “afterwards” tab to determine what notifications you want your student to get after they sign up.Screen Shot 2016-08-26 at 9.19.29 AM
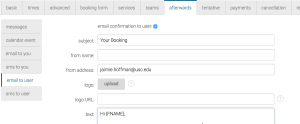
Screen Shot 2016-08-26 at 9.19.29 AM

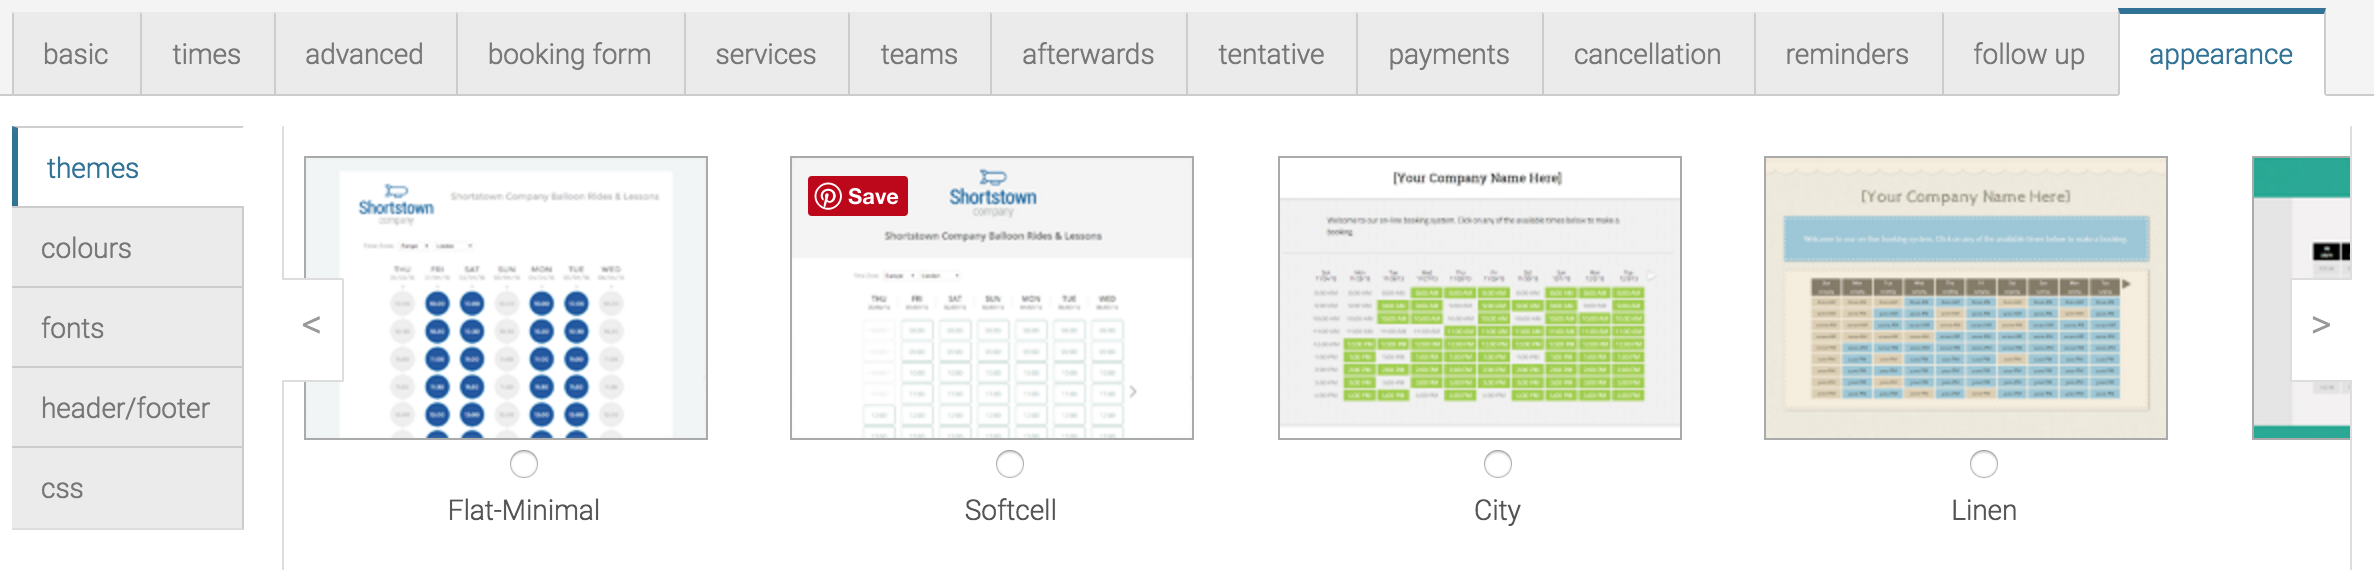
6. Click on the appearance tab to change the look and feel of your nifty web-based form
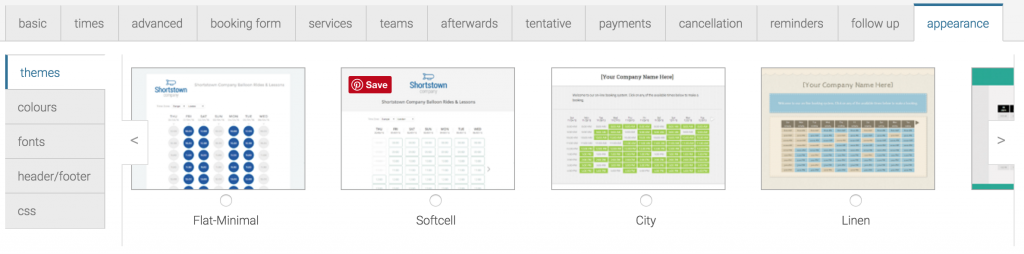
Screen Shot 2016-08-26 at 9.19.48 AM

Happy scheduling (or actually, not scheduling… that’s the point).  :)

RSS Image Feed Test 2

Dr. A's (actually he wasn't yet a "Dr.") Catalina dive crew, July 1998.

This is a test.

Image: CS Muncy via Jawbreaker.